From 0 to 5 Pull ups in 21 Days (GUARANTEED!) Sounds Interesting? Let’s hop into it!

“IT NEVER GETS EASIER, YOU GET BETTER”

So you’ve made up your mind? and want to start doing your first set of pull ups in just 21 days? Well, if you perform the workouts as written, you’ll be doing more pull ups in no time. 

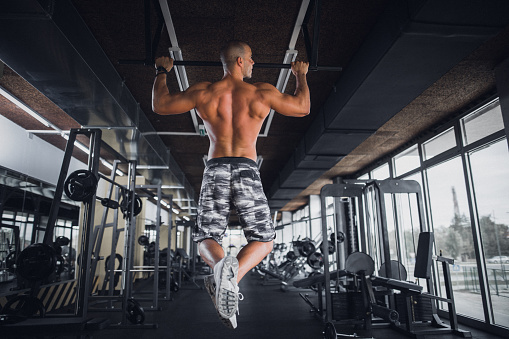
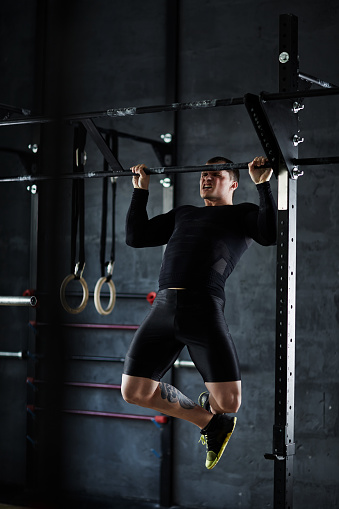
Pull ups are one of the best bodyweight back exercises you can do. The thing about them is that they can be quite discouraging when you don’t have the strength to perform at least one rep. It isn’t helpful to keep struggling to try and do pull ups at home without a plan.

But here we are to help you! with this 21 day pullup workout, you have a step by step progression for getting not only your first rep of pullups but to get many more after that. You won’t have to ask yourself ever again how to increase pull ups if you follow this workout as instructed.

It is not uncommon for those that follow the plan laid out here to go from 0 pullups to at least 3 and even 5 in just three weeks. Give this plan your all and you will be surprised at how easy pull ups will become for you.

This 21 day 0 to 5 workout for more pull-ups builds off of the tremendous success of our 21 day push up workout.  The key to the timeline is that this workout progresses you through various exercises while demanding that you increase pull ups along the way.

It consists of three weeks of testing and non-testing days that will quickly build up your back, grip and arms while helping you develop the strength to do your first set of pull ups. You won’t be asking how to do a pull-up anymore after following these tips.

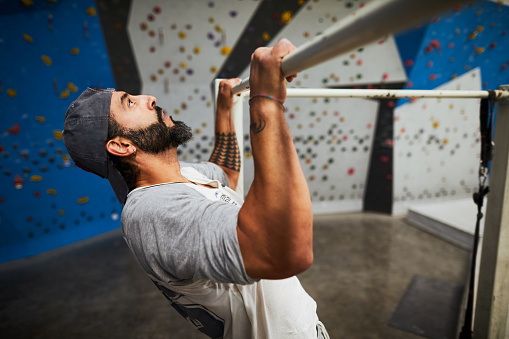
The way these workouts are structured is by first establishing your max on an assistance exercise, the inverted row to failure in a single set. From here, you rest two minutes and attempt to perform a dead arm hang from a pull-up bar for as long as you possibly can.

0-5 Pull Up Workout

  • DAY 1: TESTING DAY
  • DAY 2: NON-TESTING DAY
  • DAY 3: NON-TESTING DAY
  • DAY 4: NON-TESTING DAY

This is block 1 and form here we’ll perform 5 blocks in total.

  • Day 1-4
  • Day 5-8
  • Day 9-12
  • Day 13-16
  • Day 17-20

And on day 21, we’ll be our final test day. This is where the hard work starts to pay off and you should start doing your first set of full pull ups!

Day 1

Day 1 starts with a test day. Complete a single set of max inverted rows to failure in good form. Rest 2 minutes and then complete a set of dead arm hangs for as long as you can hold. Take this max number of rows, number as this will be used on subsequent non-testing days to be sure you are gauging your pullup strength progress the right way.

Day 2

Now on Day 2, we start a series of non-testing days. In these workouts, the goal is to perform a specific variation for the same number of reps that you did on your most recent testing day. You are allowed to rest/pause when you fatigue and you are advised to stop a few reps short of total muscle failure. This is to accommodate for the fact that you will be doing a lot of volume over the next few weeks.

The second half of the non-test day workouts require that you go back to performing inverted rows, except this time you have to complete your maximum plus 40 percent (on the first non-test day) 50 percent (on the second non-test day) and 60 percent (on the third and final non-test day in a block). Again here, you do not have to perform these unbroken. You simply have to get them done, stopping 2-3 reps shy of failure and using rest/pause.

The workout continue to progress and advance with each new testing day. Be sure to retest your maximum number at the start of each new block since you will likely be increasing your overall strength meaning that your number is going to increase. Each block is based on the number of max inverted rows that you are able to achieve on the test day that precedes that block.

Continue this until we reach day 21 of the workout. On day 21 we come back again only this time we’re testing our pull ups! This is where the hard work starts to pay off and you should start doing your first set of full pull ups!

The Bottom Line

This 3 week workout will progressively overload your back, introduce you to exercise variations that will build not just your back, grip and biceps but help you develop that sought after v-taper look as well.  If you’re looking to make total body gains be sure to follow my blog.

Hey you made it to the end, I appreciate u bro a subscribe would be amazing! Let me know your thoughts. No matter what your age is exercise can help you achieve greater physical and mental fulfillment at any age.

New post every Monday and Thursday

Found this post Interesting?

Lets stay in touch!

Stretching in just 5 minutes! Sounds Interesting? Let’s hop into it!

“True success is achieved by stretching oneself, learning to feel comfortable being uncomfortable”

Why should i stretch before and after training? continue reading you’ll find the answer!

First things first, before heading to stretching you should warm up your body. Here is my effective 5 minute warm up routine to warm up. From weekend warriors to elite athletes, stretching before exercise is a common practice. Stretching is the important link between the sedentary life and the active life. Stretching for sport and exercise improves flexibility, which increases the ability of a joint to move through its full range of motion; in other words, how far it can twist, bend and reach. Some activities, such as gymnastics, require more flexibility than others, such as running.

What will happen if i stretch regularly!

Regular stretching is thought to increase flexibility, both by making muscles more supple and by retraining the nervous system to tolerate stretching further. Flexibility from regular stretching gradually disappears once you stop stretching. It’s unclear whether the increase in range of motion of a joint is due to physical changes in the muscles that control those joints, or just a greater tolerance to stretching.

Some basics about stretching

  • First things first, hold a stretch for 10-20 seconds
  • If you are not holding a stretch it’ll not give you any benefit.
  • Don’t stretch too far especially in the beginning.
  • Get a slight stretch and increase it after you feel yourself relax.
  • Hold stretch in a comfortable position,the stretch tension should subside as you hold it.
  • Breathe slowly deeply and naturally-exhale as you bend forward.
  • Do not bounce. Bouncing tightens the very muscles you are trying to stretch. Stretch and hold it.
  • Do not try to be flexible. Just learn to stretch properly and flexibility will come with time.

You should not stretch when…

  • If you have an injury
  • The range of motion is limited in some way
  • The joint is inflamed or infected
  • There has been a recent bone fracture, sprain or strain

So here are the 5 stretches that i do before and after a training session!

The simple hamstring stretch

  1. Sit on the floor with both legs out straight.
  2. Extend your arms and reach forward by bending at the waist as far as possible while keeping your knees straight.
  3. Hold this position for 15 to 20 seconds.
  4. Relax back into the starting position.

The simple glute stretch

  1. Start on all fours. Lay your right knee toward your right wrist, placing your shin on the floor. Move your right ankle toward your left wrist.
  2. Slide your left leg back, point your toes, and face your hips forward. Extend your spine.
  3. Gently walk your hands forward. Hold for 5 to 10 breaths.
  4. Return to the starting position. Switch legs and repeat.

Next stretch is knee to shoulder

  1. Start on your back with your legs extended and your feet flexed upward.
  2. Bend and lift your right knee and place your hands around your knee.
  3. Pull your right knee up toward your left shoulder.
  4. Hold for 20–30 seconds. Return your leg to the starting position.
  5. Straighten your right leg and repeat with the left leg.

Lunge stretch

  • Place your hands on your forward knee.
  • Keep your shoulders relaxed, your hips even, your chest open, and your gaze straight ahead.
  • Press down with your hands and drive the hips forward until you feel a stretch from the front of your hip, groin, and thigh on your left side.
  • Hold the stretch for about 20 to 30 seconds.

Bent-arm wall stretch

  • Assume a split stance, Right leg in the front and left leg in the back, at the end of a wall or in a doorway.
  • Bring the left arm up to shoulder height and position the palm and inside of the arm on the wall surface or doorway. Your arm should look like a goal post.
  • Gently press the chest through the open space to feel the stretch.
  • Moving the arm higher or lower will allow you to stretch various sections of the chest.
  • Repeat on the other side.

Bicep stretch

  1. Sit on the floor with your feet flat and knees bent.
  2. Place your palms on the floor behind you with your fingers pointing away from your body.
  3. Keeping your hands in place, slowly slide your butt away from your hands until you feel a stretch in your biceps.
  4. Hold for at least 20-30 seconds.

Bent-arm shoulder stretch

  1. Start standing or sitting tall. Place one arm across your body and bend your elbow to 90 degrees, with your hand pointing up.
  2. Using your other arm, pull your elbow toward your opposite shoulder.
  3. Hold for at least 30 seconds and then repeat on the other side.

The Bottom Line

So Stretching before you exercise will open up many opportunities for you .You will be able to run, cycle, ski or swim with greater ease .

You will find that cycling helps running and that running and cycling help skiing, and that stretching will help keep you tuned for any of these activities .No longer will you have to worry about becoming tight from one activity ,and thus cutting down on your enjoyment of another-so long as you stretch and relax.

Hey you made it to the end, I appreciate u bro a subscribe would be amazing! No matter what your age is exercise can help you achieve greater physical and mental fulfillment at any age.

New post every Monday and Thursday

Found this post Interesting?

Lets stay in touch

Design a site like this with WordPress.com
Get started